The Best Fluffy Pancakes recipe you will fall in love with. Full of tips and tricks to help you make the best pancakes.
Best Strawberry Ice Cream KitchenAid Attachment
If you are looking for a rich, delicious, dark Strawberry ice cream recipe, stop. You’ve found it. This decadent Strawberry Ice Cream KitchenAid Attachment might be my all time favorite ice cream recipe.Ice cream into one delicious dessert, grab a spoon. I’ll wait.

There is just something special about homemade ice cream and especially when it is strawberry because it is bright and sweet and a little messy which makes it feel just like summer itself.
I still remember the first time I tried making it using the KitchenAid attachment and I didn’t pre-freeze the bowl which was a total rookie mistake so the result turned out to be strawberry soup and even though it was delicious it definitely wasn’t what I had in mind.
Now I have mostly figured it out and honestly it has turned into a little tradition because every June we start the season by making a batch while the windows are open and the kids sneak tastes right in the middle of the churning which makes it chaotic and perfect at the same time.

Have you ever tried making your own ice cream at home because if you haven’t then trust me you are going to love this one since it is creamy and fresh and super easy once you understand how to use the attachment and by the way the color is so pretty that it is totally Instagram-worthy.
Just make sure not to blame me if you end up eating half of it before it even gets into the freezer.
Ingredients :
- 2 cups fresh strawberries washed and hulled
- ¾ cup granulated sugar divided
- 2 cups heavy cream
- 1 cup whole milk
- 1 tsp pure vanilla extract
- Pinch of salt
- Optional: 1 tablespoon lemon juice for brightness

How to Make Strawberry Ice Cream KitchenAid Attachment
Step 1
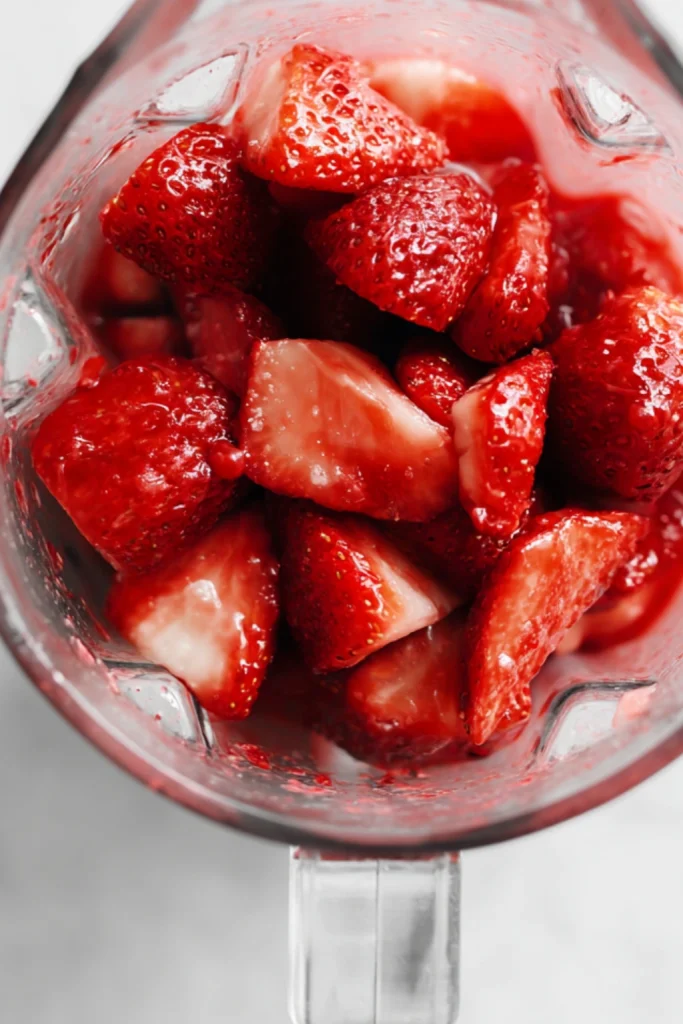
The first thing you need to do is prepare the strawberries. Slice the strawberries and place them in a bowl. Add 1/4 cup of sugar and lemon juice optional. Let them sit for 20–30 minutes until soft and juicy. Then, mash them gently with a fork or blend them if you prefer a smoother ice cream.
Step 2
Now start preparing the ice cream base. In a large mixing bowl, whisk together the remaining 1/2 cup of sugar, heavy cream, whole milk, vanilla extract, and salt. Add the crushed or blended strawberries and mix well, and Chill the mixture For best results, chill the whole mixture in the refrigerator for 2 to 4 hours. You can also chill it overnight. Cold ingredients help the ice cream freeze faster and creamier.
Step 3
Make sure your ice cream bowl has been frozen for at least 15 hours before using it. Attach the frozen bowl to your stand mixer, place the dasher that’s the paddle that churns, and lock it into place.
Step 4
Now it’s time to whip the ice cream. Turn the blender on “stir” or low speed, and slowly pour the cooled ice cream base into the bowl. Let it whip for 20–30 minutes, or until the ice cream is thick and smooth like soft serve ice cream.
Step 5
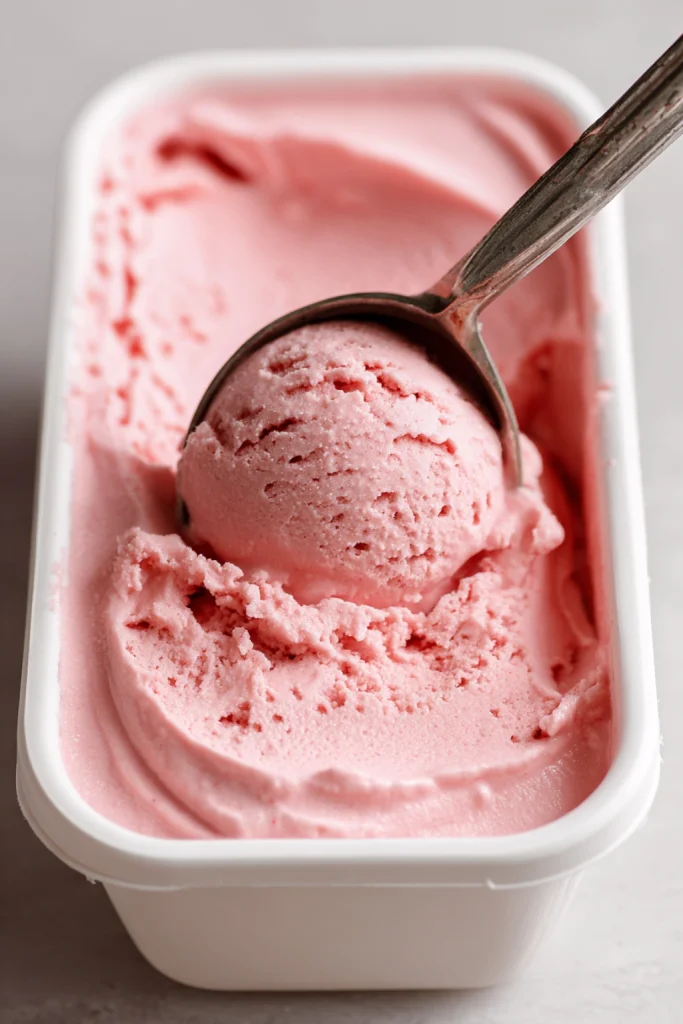
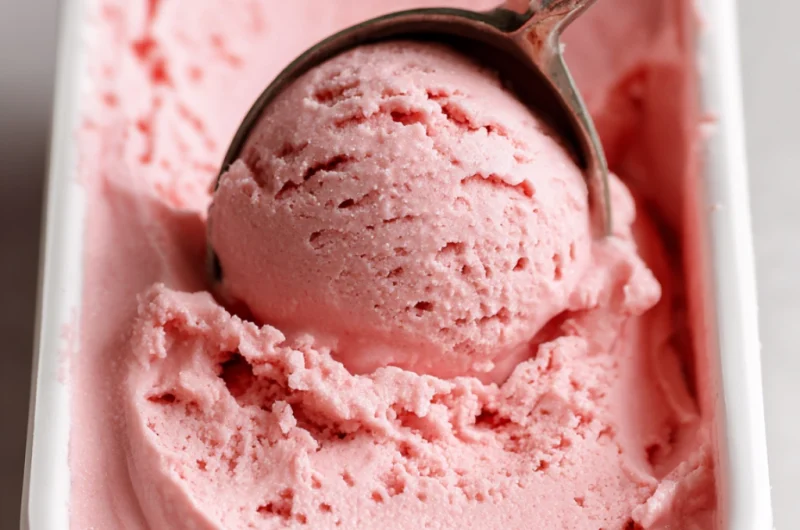
Finally, you can freeze the ice cream until it’s firm. Transfer the ice cream to a freezer-safe container. Smooth the surface with a spatula, cover, and freeze for two to four hours, or until firm. Then scoop it out and enjoy!
Kitchen Equipment Needed :
To make these yummy Strawberry Ice Cream KitchenAid Attachment, you’ll only need a few basic kitchen tools
- KitchenAid Stand Mixer
- KitchenAid Ice Cream Attachment frozen bowl, dasher, and drive assembly
- Medium bowl for strawberries
- Large bowl for mixing base
- Whisk or spoon
- Measuring cups and spoons
- Spatula
- Freezer-safe container with lid
- Blender or potato masher optional, for strawberry texture
Tips for Making the Best Strawberry Ice Cream
Chill everything even your mixing bowl before making the base to help it churn faster.
Like it sweeter? Taste your base before churning and adjust the sugar if needed.
Want it chunky? Save some chopped strawberries and stir them in after churning.
What to Eat with Strawberry Ice Cream KitchenAid Attachment ??
I usually eat it on its own because it’s delicious on its own. Sometimes I put a scoop between two cookies and it’s really good. As for my son, he loves it with muffins. He puts it on top of the muffins and enjoys it. When I serve it to my mother-in-law, she usually adds a drizzle of honey and some nuts.
FAQ’S
How long do I freeze the KitchenAid ice cream bowl ?
Freeze it for at least 15 hours or overnight so it’s super cold before use.
Can I use almond milk or oat milk instead of whole milk ?
Yes, but your ice cream will be less creamy. Plant-based milks work best with added fat like coconut cream.
Can I make other flavors with the same attachment ?
Yes! You can make chocolate, vanilla, cookie dough, and more using the same attachment.
How do I know when the ice cream is done churning ?
It will look thick and fluffy, like soft-serve ice cream.
SAVE THIS POST TO YOUR FAVORITE PINTEREST BOARD !

Strawberry Ice Cream KitchenAid Attachment
Course: DessertCuisine: AmericanDifficulty: EasyServings
6
servingsPrep time
15
minutesCooking time
30
minutesCalories
260
kcalTotal time
3
hoursThis creamy and refreshing Strawberry Ice Cream is made using the KitchenAid Ice Cream Attachment and just a few simple ingredients. Packed with fresh strawberries and real cream, it’s the perfect homemade dessert for hot summer days, birthday parties, or sweet family moments. Easy to make and even easier to love!
Ingredients
2 cups fresh strawberries washed and hulled
¾ cup granulated sugar divided
2 cups heavy cream
1 cup whole milk
1 tsp pure vanilla extract
Pinch of salt
Optional: 1 tablespoon lemon juice for brightness
Directions
- The first thing you need to do is prepare the strawberries. Slice the strawberries and place them in a bowl. Add 1/4 cup of sugar and lemon juice optional. Let them sit for 20–30 minutes until soft and juicy. Then, mash them gently with a fork or blend them if you prefer a smoother ice cream.
- Now start preparing the ice cream base. In a large mixing bowl, whisk together the remaining 1/2 cup of sugar, heavy cream, whole milk, vanilla extract, and salt. Add the crushed or blended strawberries and mix well, and Chill the mixture For best results, chill the whole mixture in the refrigerator for 2 to 4 hours. You can also chill it overnight. Cold ingredients help the ice cream freeze faster and creamier.
- Make sure your ice cream bowl has been frozen for at least 15 hours before using it. Attach the frozen bowl to your stand mixer, place the dasher that’s the paddle that churns, and lock it into place.
- Now it's time to whip the ice cream. Turn the blender on "stir" or low speed, and slowly pour the cooled ice cream base into the bowl. Let it whip for 20–30 minutes, or until the ice cream is thick and smooth like soft serve ice cream.
- Finally, you can freeze the ice cream until it's firm. Transfer the ice cream to a freezer-safe container. Smooth the surface with a spatula, cover, and freeze for two to four hours, or until firm. Then scoop it out and enjoy!
Notes
- Freeze the bowl for at least 15 hours, This is the most important step! If the bowl isn’t completely frozen, your ice cream won’t churn properly.
- Use ripe, sweet strawberries, Ripe strawberries have the best flavor and color. Avoid under-ripe or bland ones.
- Add a splash of lemon juice, A little lemon juice brightens the strawberry flavor and adds a fresh zing.
- Don’t overfill the bowl ,Leave space in the bowl for the mixture to expand as it churns.