This easy recipe for spring jam is very simple to follow and also it does not need canning and it does not use pectin. Sometimes I buy too many ripe pears and then I do not know what to do with them so this recipe becomes very helpful.
In addition ripe s add a nice balance because they are sweet but also a little tart and as a result the jam tastes amazing and it is perfect for giving as a gift during the holidays.
Moreover this recipe is fast and easy and it is also vegan so you can make it in about fifty five minutes without any stress. Finally making homemade pear jam is very simple and even if you have never made jam before you will still find it easy to prepare.
Kitchen Equipment Needed :
- Large cooking pot
- Wooden spoon
- Knife and cutting board
- Potato masher or fork
- Measuring cups and spoons
- Clean glass jars with lids
- Ladle
- Plate for testing jam thickness
Tips for Pear Jam
– The quality of your pears makes a huge difference in your jam. Always choose ripe pears that are slightly soft when you press them gently.
– Stirring regularly helps prevent sticking and ensures everything cooks evenly. A slow cooking process also helps you achieve that perfect thick and glossy texture.
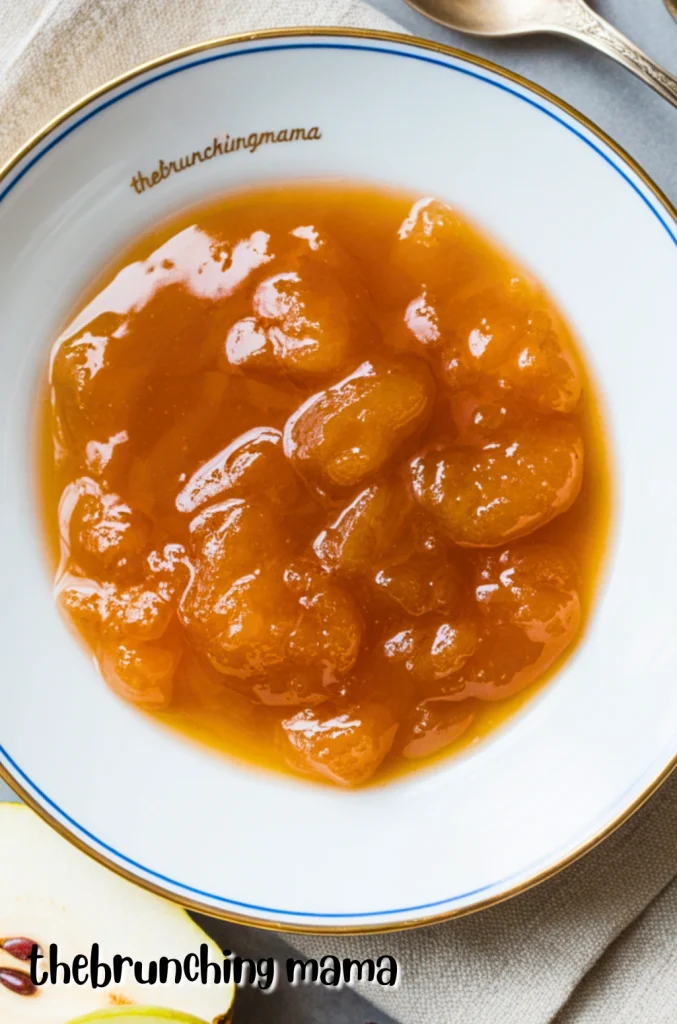
– One of the most important steps is checking if your jam has reached the right thickness. A simple way to do this is the cold plate test: place a small spoonful of jam on a chilled plate, wait a few seconds, then run your finger through it. If it wrinkles slightly and doesn’t run, your jam is ready.
What to Eat with Pear Jam ??
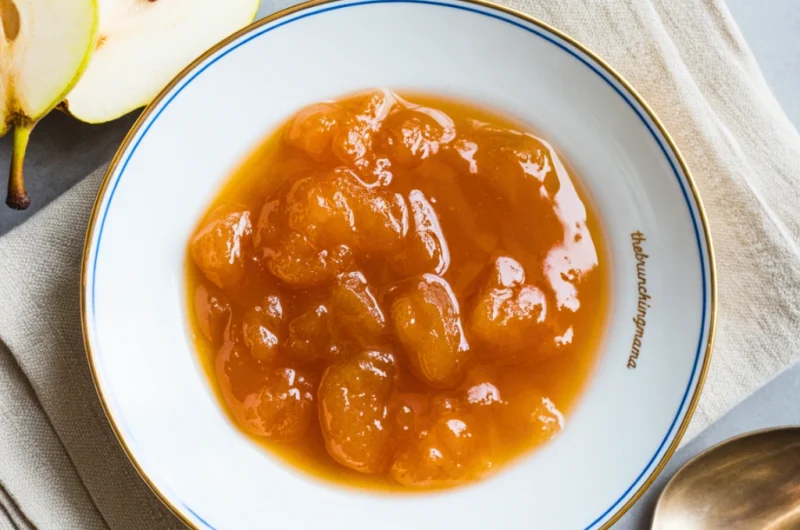
This Pear Jam Recipe is sweet, smooth delicate flavor, making it perfect for breakfast spreads, brunch boards. I love serving it generously spread over warm Onion Bagels or soft Garlic Bagels with a little butter or cream cheese.
For a cozy morning, it pairs beautifully with baked goods like Banana Bread With Almond Flour or Cinnamon Coffee Cake Muffins
to add a naturally sweet, fruity touch. My son loves it spread thick on toast, while my husband enjoys a spoonful alongside his coffee for a simple, comforting start to the day.
Ingredients you need to make Pear Jam :
– Fresh pears are the star of this jam and bring natural sweetness and a soft, delicate flavor.
– Sugar sweetens the jam and helps it set into that classic spreadable texture.
– Lemon juice adds brightness and balances the sweetness.
– Lemon zest is optional but adds a fresh citrus aroma that enhances the pear flavor.
– Water helps the pears soften and cook down smoothly at the beginning.
– Vanilla extract adds warmth and depth, making the jam taste richer and more dessert-like.
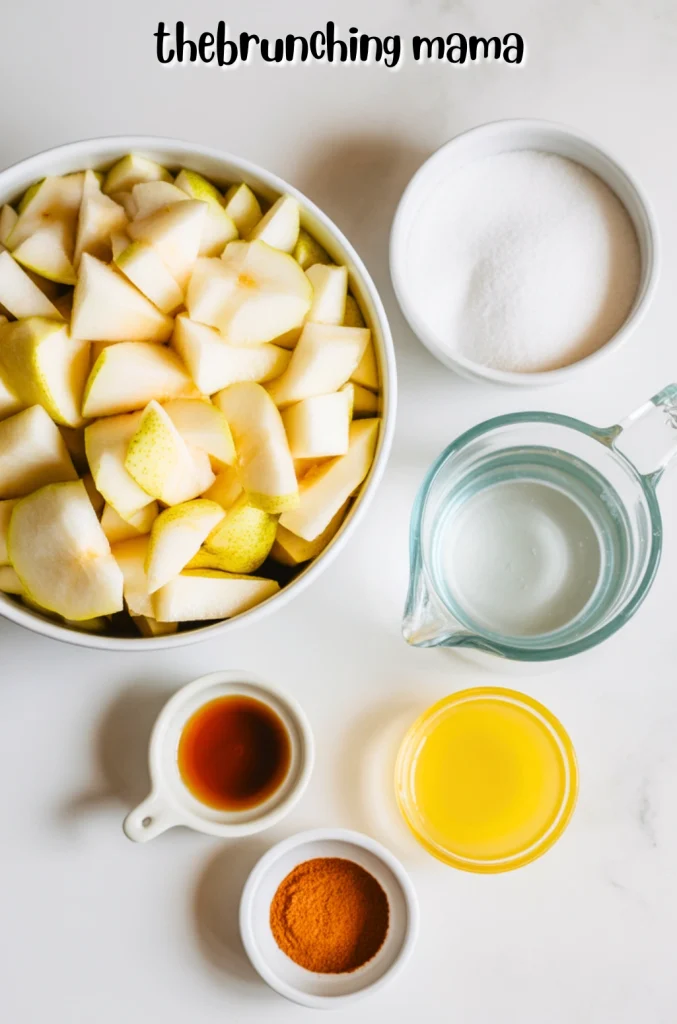
- Optional : ginger adds a subtle spice and warmth for a more complex flavor
How to Make Pear Jam :
Step 1
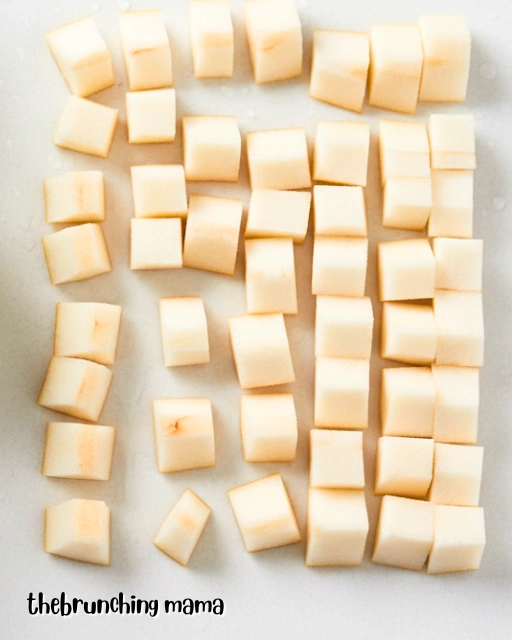
Start by washing your pears well, then peel, core, and cut them into small pieces. The smaller the pieces, the faster they cook.
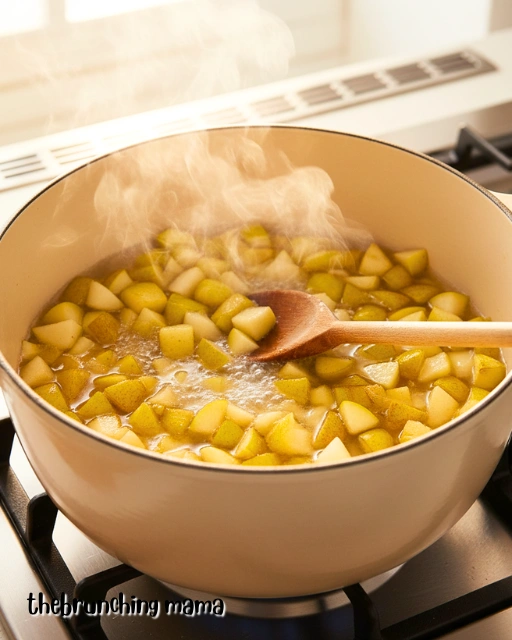
Place the chopped pears into a large pot. Add the water and cook on medium heat until the pears begin to soften. Stir gently so they don’t stick.
Step 2
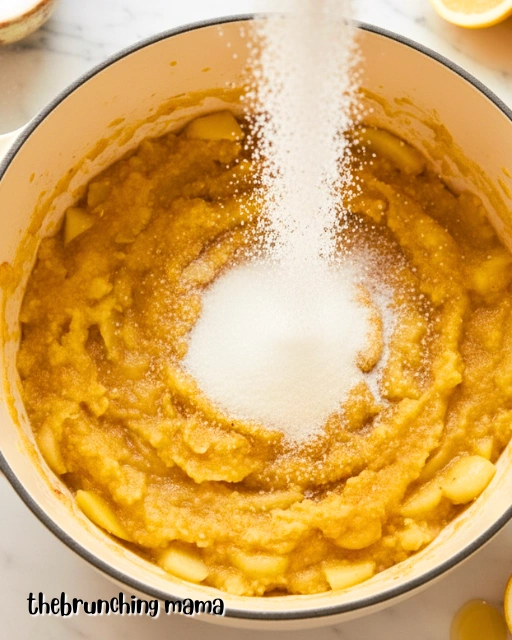
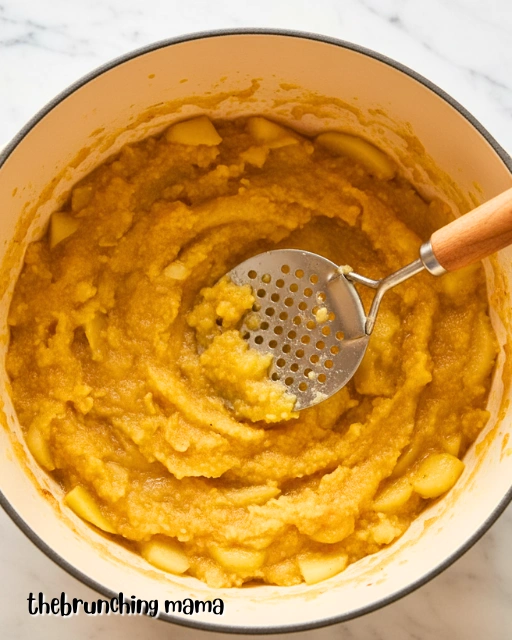
Next up once the pears are soft, mash them using a spoon or potato masher until you reach your desired texture smooth or slightly chunky.
Add the sugar and lemon juice. Stir well and let the mixture cook slowly. Keep stirring every few minutes to avoid burning.
Step 3
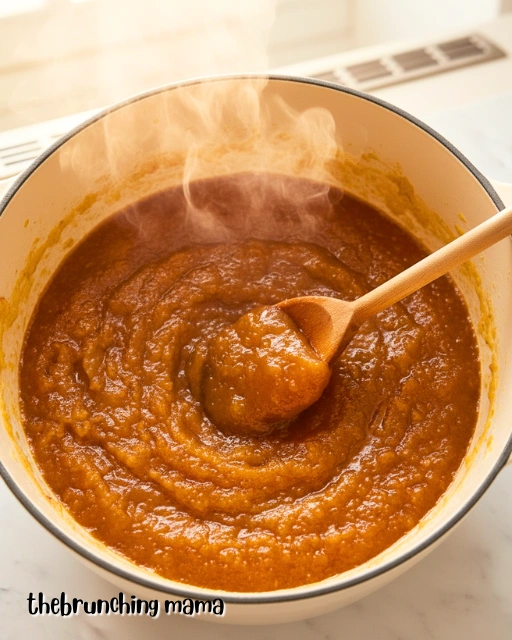
Together as the jam cooks, it will start to thicken. This can take about 25–40 minutes. Be patient this step is important!
If you like, add vanilla extract or cinnamon for extra flavor. Stir well.
Step 4
To check if your jam is ready, place a small amount on a cold plate. If it thickens and doesn’t run, it’s done.
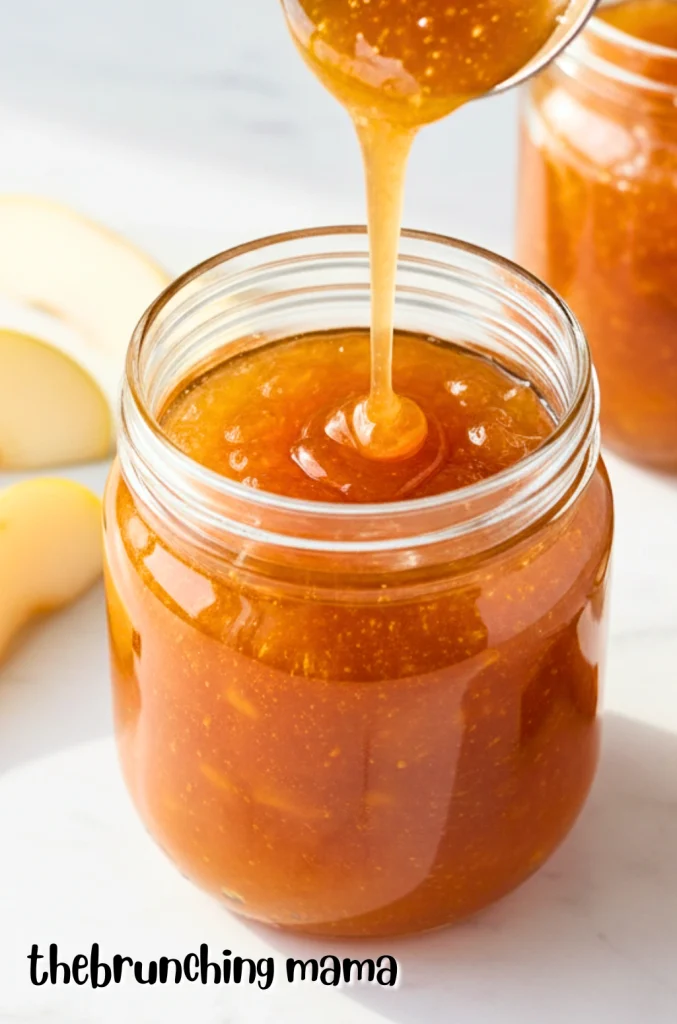
Turn off the heat and let the jam cool slightly before placing it into clean jars.
FAQ’S :
Can I use unripe pears for Make Pear ?
It’s better to use ripe pears because they are sweeter and softer.
Why is my jam too runny ?
It may need more cooking time to thicken.
Can I add other fruits ?
Yes, apples or berries mix well with pears.
SAVE THIS POST TO YOUR FAVORITE PINTEREST BOARD !
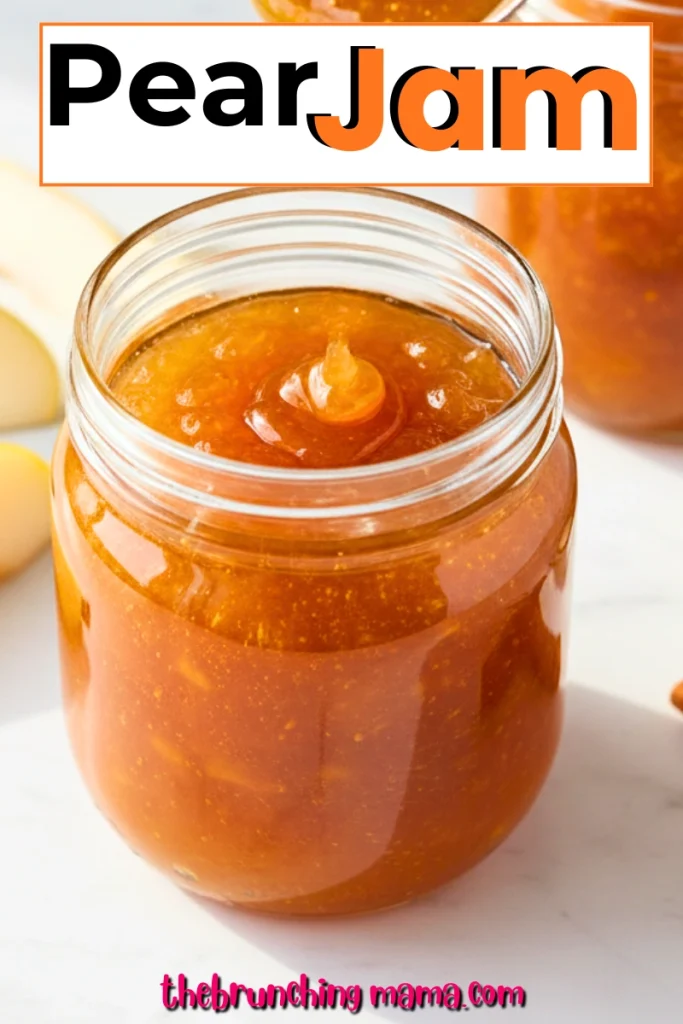
Homemade Pear Jam Recipe
Course: Breakfast, Snack, CondimentCuisine: American, International, HomemadeDifficulty: Easy4
servings20
minutes35
minutes300
kcal55
minutesPear jam is a sweet, smooth, and easy homemade spread made with ripe pears, sugar, and a touch of lemon. It’s perfect for toast, desserts, or snacks, and brings a soft, natural fruity flavor everyone will enjoy.
Ingredients :
2 kg ripe pears " about 8–10 large pears " peeled, cored, and chopped
1 1/2 cups (300 g) granulated sugar
2 tablespoons (30 ml) fresh lemon juice
1/4 cup (60 ml) water
- Optional :
1 teaspoon (5 ml) vanilla extract
1/2 teaspoon ground cinnamon
Directions
- Start by washing your pears well, then peel, core, and cut them into small pieces. The smaller the pieces, the faster they cook.
- Place the chopped pears into a large pot. Add the water and cook on medium heat until the pears begin to soften. Stir gently so they don’t stick.
- Next up once the pears are soft, mash them using a spoon or potato masher until you reach your desired texture smooth or slightly chunky.
- Add the sugar and lemon juice. Stir well and let the mixture cook slowly. Keep stirring every few minutes to avoid burning.
- Together as the jam cooks, it will start to thicken. This can take about 25–40 minutes. Be patient this step is important!
- If you like, add vanilla extract or cinnamon for extra flavor. Stir well.
- To check if your jam is ready, place a small amount on a cold plate. If it thickens and doesn’t run, it’s done.
- Turn off the heat and let the jam cool slightly before placing it into clean jars.
Notes
- Cut pears into small, even pieces so they cook evenly.
- Always use clean, sterilized jars to extend shelf life.
- Use a wide, heavy-bottomed pot for better heat distribution.
- For a chunkier texture, mash lightly and leave small pieces.