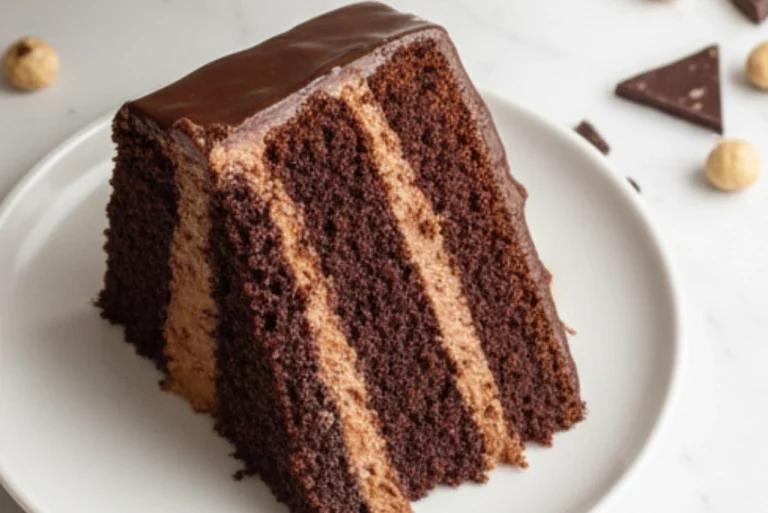
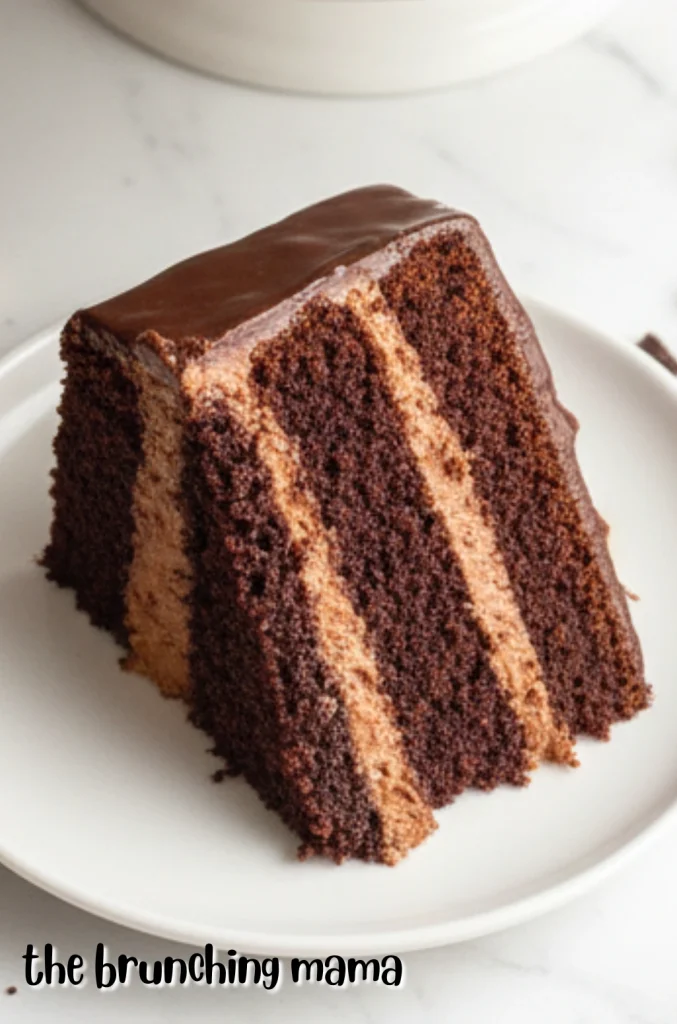
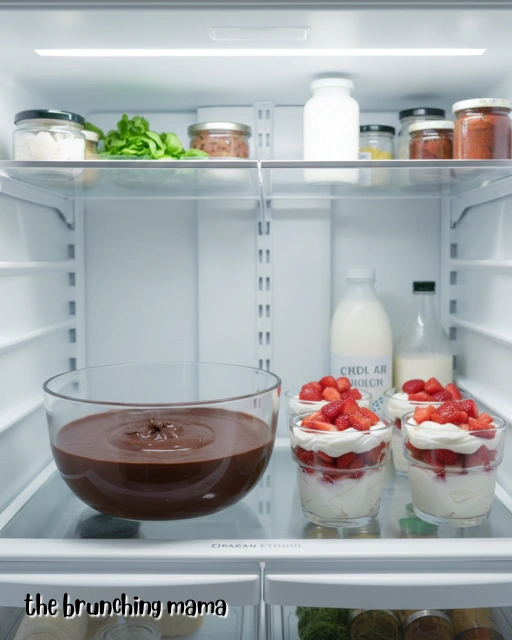
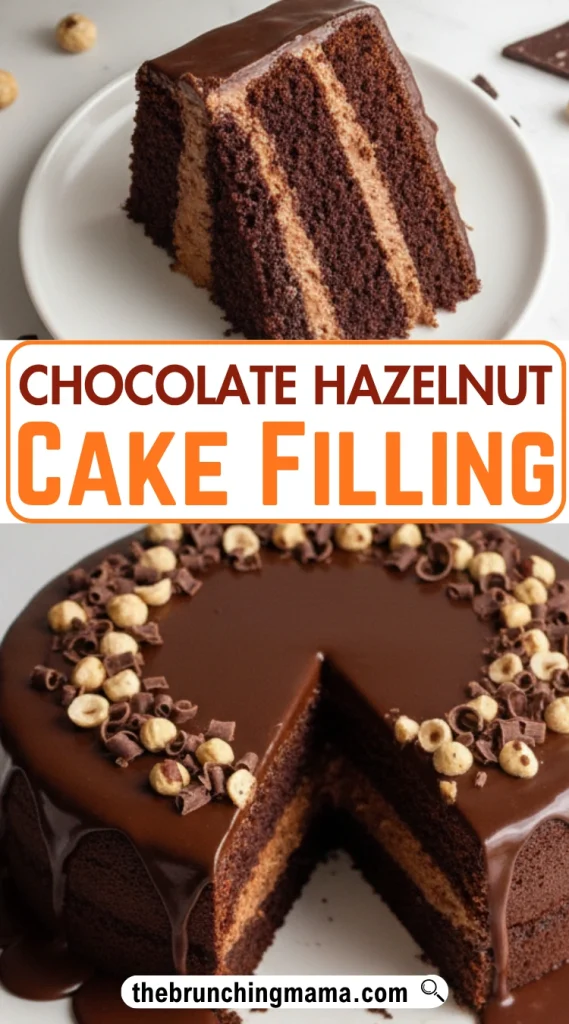
This is the easy homemade Chocolate Hazelnut Cake Filling recipe! This Chocolate Hazelnut Cake Filling tastes like it has chocolate cake baked in! Delicious, fluffy and tastes ahhhh-mazing and it’ll be your new and best favorite chocolate cake recipe!
This Chocolate Hazelnut Cake Filling will surprise you with how easy it is to actually whip up something stunning from scratch with minimal ingredients.
A total winner that will impress your family and friends ! you’re sure to love this sweet chocolate filling and favorite
If you love decadent chocolate desserts with a creamy mousse texture, try Homemade Tofu Chocolate Mousse this, or my simple Fudgy Flourless Chocolate Cake recipe.
Kitchen Equipment Needed :
- Medium mixing bowl
- Small saucepan
- Whisk
- Rubber spatula
- Measuring cups and spoons
- Hand mixer or stand mixer
- Spoon for stirring
- Airtight container for storage
Tips for Chocolate Hazelnut Cake Filling
– Raw hazelnuts are fine, but toasted hazelnuts are much more flavorful and aromatic. Toasting brings out their natural oils and makes the nutty taste stronger and richer. You can toast them in the oven for about 8–10 minutes until they smell warm and slightly golden.
– This filling actually tastes even better after resting for a few hours or overnight. When it sits, the flavors of chocolate, hazelnut, and vanilla blend together more deeply. Making it ahead of time also saves stress when you are baking a cake.
– The chocolate you choose makes a huge difference in this recipe. If you use cheap chocolate chips, the filling may taste flat or overly sweet. Try using good-quality semi-sweet or dark chocolate because it melts smoothly and gives a rich, deep flavor.
– One of the biggest mistakes people make is heating the cream too quickly or boiling it. If the cream gets too hot, the chocolate can become grainy or separate. Instead, warm the cream slowly over low to medium heat until it is just steaming with small bubbles around the edges.
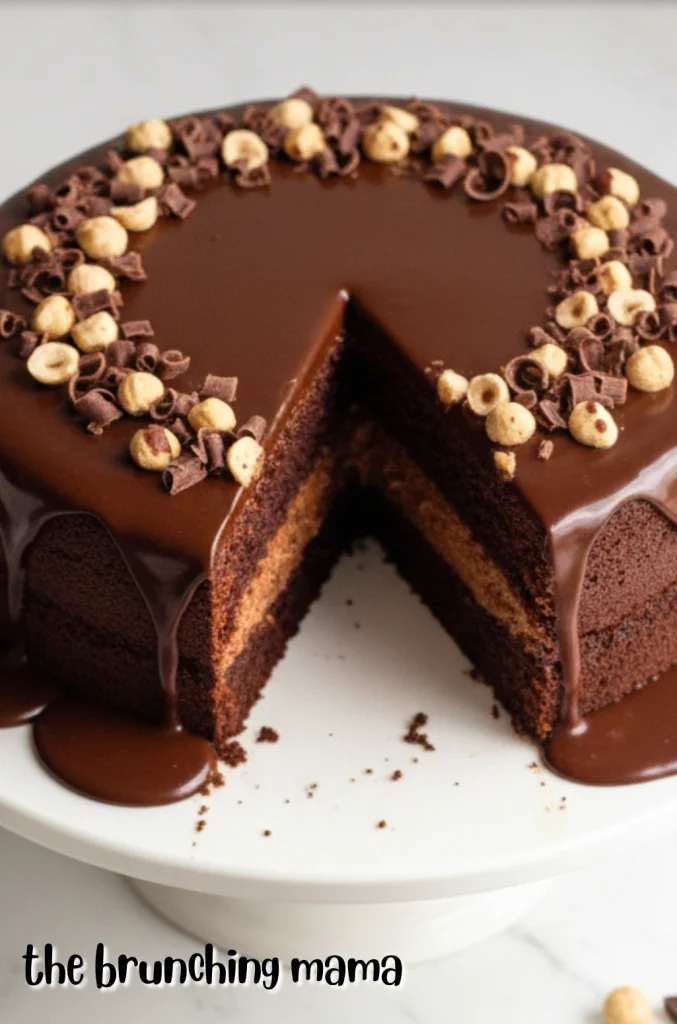
What to Eat with Chocolate Hazelnut Cake Filling ??
Chocolate Hazelnut Cake Filling is rich, creamy, and perfectly indulgent, making it ideal for layered cakes, cupcakes, and elegant homemade desserts. I love pairing it with soft baked treats like Vanilla Cupcakes or fluffy Chocolate Crepes for a dessert that feels bakery-worthy right at home.
For a dessert spread, it pairs beautifully with fruity flavors like Strawberry Shortcake Cupcakes or bright Lemon Blueberry Cupcakes to balance the rich chocolate flavor.
If we’re hosting, I’ll sometimes add something creamy like Tofu Chocolate Mousse to create a rich chocolate dessert table everyone gathers around first.
Ingredients you need to make Chocolate Hazelnut Cake Filling :
– Chocolate hazelnut spread is the star of this filling and gives it that rich.
– Dark or semi-sweet chocolate deepens the flavor.
– Heavy cream creates a smooth.
– Butter adds richness and gives the filling a glossy, velvety finish.
– Powdered sugar lightly sweetens the filling while keeping it smooth.
– Vanilla extract enhances the chocolate flavor and adds warmth.
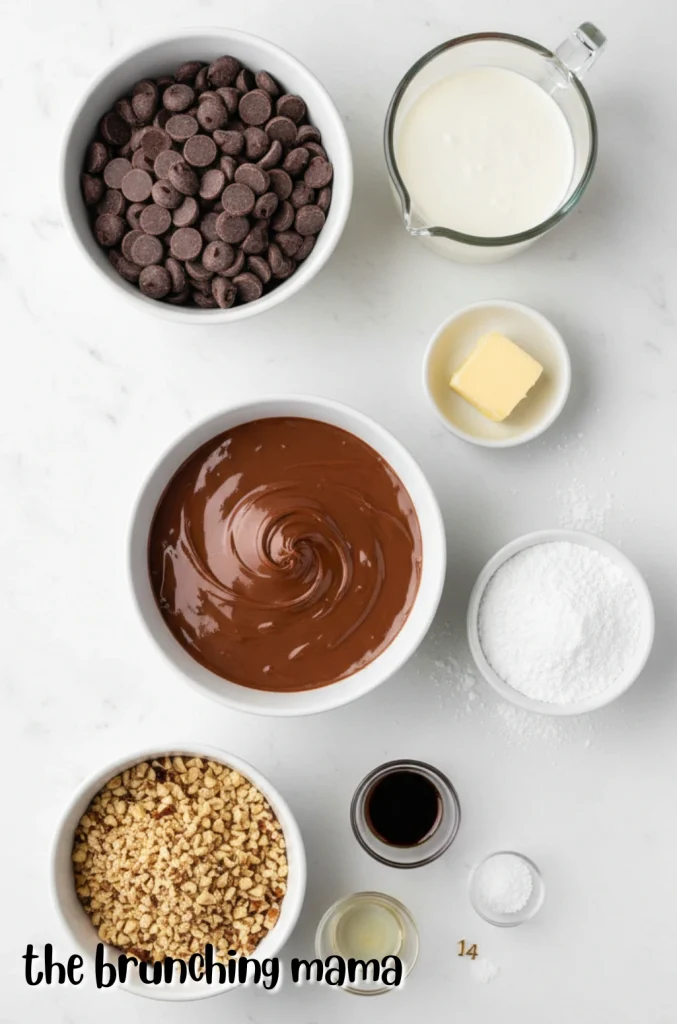
Optional :
- Cocoa powder intensifies the chocolate flavor without making the filling too sweet
- Cream cheese can be added for a tangy, mousse-like texture
How to Make Chocolate Hazelnut Cake Filling :
Step 1
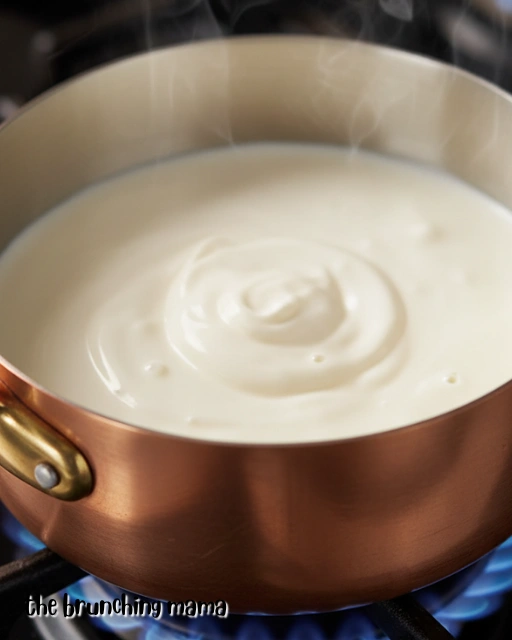
Begin by preparing pour the heavy cream into a small saucepan and place it over medium-low heat. Warm the cream slowly until it is hot but not boiling. You may notice small bubbles around the edges of the pan, which means it is ready. Be careful not to let it boil because overheated cream can change the texture of the filling.
Step 2
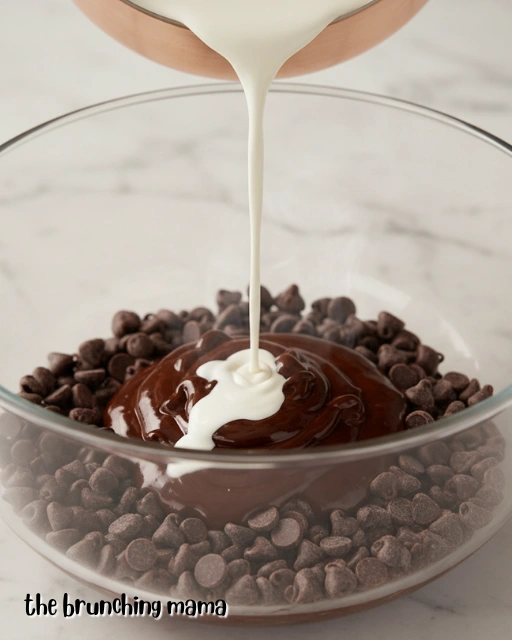
As you go along place the chocolate chips in a medium mixing bowl. Carefully pour the warm cream over the chocolate chips. Let the bowl sit untouched for about 2 minutes. This resting time helps the chocolate soften properly.
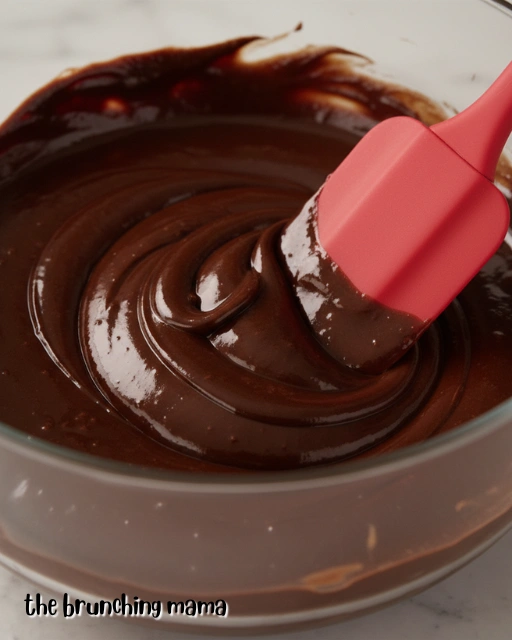
After waiting, use a whisk or spatula to stir slowly until the mixture becomes smooth, shiny, and creamy. If a few chocolate pieces remain, keep stirring gently until they melt completely.
Step 3
Immediately after add the chocolate hazelnut spread, softened butter, vanilla extract, and salt into the bowl. Mix everything together until the filling looks silky and smooth. The butter helps make the filling creamy and easy to spread while the vanilla adds a warm sweet flavor.
Step 4
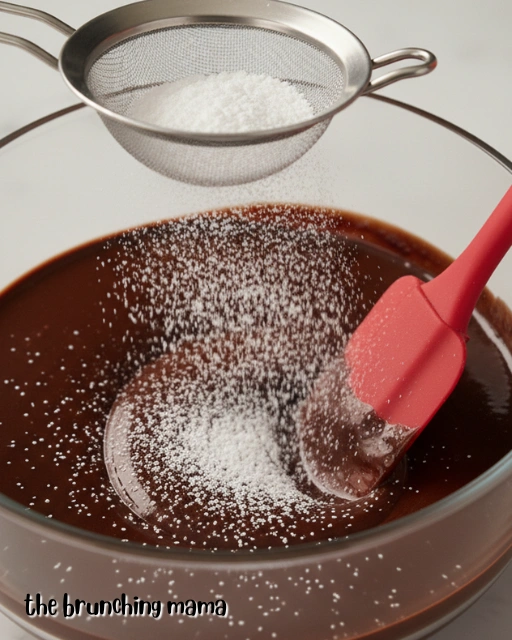
As you move along slowly add the powdered sugar a little at a time while mixing. This keeps lumps from forming and makes the filling light and fluffy. Continue mixing until the texture becomes smooth and thick enough to spread easily.
Step 5
As you progress fold in the finely chopped roasted hazelnuts using a spatula. The small nut pieces give the filling a crunchy texture and extra nutty flavor. Stir gently so the filling stays fluffy and creamy.
Step 6
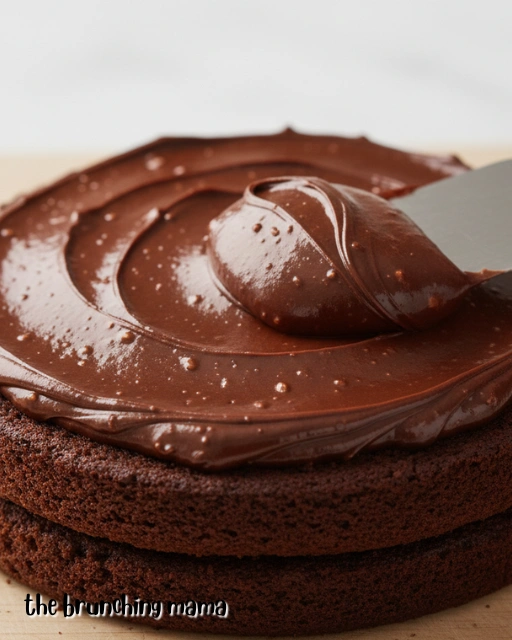
Moving forward allow the filling to cool for about 20 to 30 minutes. As it cools, it will thicken slightly and become easier to spread between cake layers. If you want an even thicker filling, place it in the refrigerator for 10 to 15 minutes before using.
Step 7
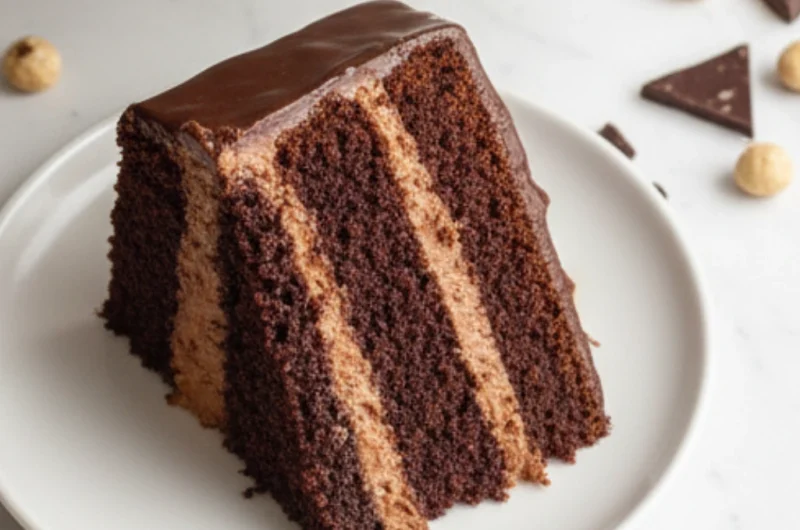
Spread the filling evenly between cake layers using a spatula or spoon. You can also pipe it into cupcakes or use it as a topping for brownies and pastries. The creamy chocolate and crunchy hazelnuts make every dessert taste extra special.
FAQ’S :
Chocolate Hazelnut Cake Filling
Can I make the Chocolate Hazelnut Cake Filling without hazelnuts ?
Yes. You can leave out the hazelnuts if you want a smooth chocolate filling without crunch.
Can I use milk chocolate instead of semi-sweet chocolate for make Chocolate Hazelnut Cake Filling ?
Absolutely. Milk chocolate makes the filling sweeter and creamier.
How thick should the Chocolate Hazelnut Cake Filling be ?
The filling should be thick enough to spread easily without dripping off the cake layers.
Can I freeze Chocolate Hazelnut Cake Filling ?
Yes. Freeze it in an airtight container for up to 2 months.
Can I use this Chocolate Hazelnut Cake Filling for cupcakes ?
Yes. It works perfectly inside cupcakes or piped on top as frosting.
SAVE THIS POST TO YOUR FAVORITE PINTEREST BOARD !
Chocolate Hazelnut Cake Filling
Course: DessertCuisine: AmericanDifficulty: Easy8
servings15
minutes5
minutes220
kcal20
minutesThis Chocolate Hazelnut Cake Filling is creamy, rich, smooth, and packed with delicious chocolate and nutty flavor. It is perfect for cakes, cupcakes, brownies, and many sweet desserts. Easy to make and loved by both kids and adults.
Ingredients :
1 cup semi-sweet chocolate chips
1/2 cup heavy cream
1/2 cup chocolate hazelnut spread
1/4 cup unsalted butter, softened
1 teaspoon vanilla extract
1/4 teaspoon salt
1/2 cup powdered sugar
1/2 cup roasted hazelnuts, finely chopped
Optional :
1 tablespoon cocoa powder for deeper chocolate flavor
1 teaspoon espresso powder to enhance the chocolate taste
Directions
- Begin by preparing pour the heavy cream into a small saucepan and place it over medium-low heat. Warm the cream slowly until it is hot but not boiling. You may notice small bubbles around the edges of the pan, which means it is ready. Be careful not to let it boil because overheated cream can change the texture of the filling.
- As you go along place the chocolate chips in a medium mixing bowl. Carefully pour the warm cream over the chocolate chips. Let the bowl sit untouched for about 2 minutes. This resting time helps the chocolate soften properly.
- After waiting, use a whisk or spatula to stir slowly until the mixture becomes smooth, shiny, and creamy. If a few chocolate pieces remain, keep stirring gently until they melt completely.
- Immediately after add the chocolate hazelnut spread, softened butter, vanilla extract, and salt into the bowl. Mix everything together until the filling looks silky and smooth. The butter helps make the filling creamy and easy to spread while the vanilla adds a warm sweet flavor.
- As you move along slowly add the powdered sugar a little at a time while mixing. This keeps lumps from forming and makes the filling light and fluffy. Continue mixing until the texture becomes smooth and thick enough to spread easily.
- As you progress fold in the finely chopped roasted hazelnuts using a spatula. The small nut pieces give the filling a crunchy texture and extra nutty flavor. Stir gently so the filling stays fluffy and creamy.
- Moving forward allow the filling to cool for about 20 to 30 minutes. As it cools, it will thicken slightly and become easier to spread between cake layers. If you want an even thicker filling, place it in the refrigerator for 10 to 15 minutes before using.
- Spread the filling evenly between cake layers using a spatula or spoon. You can also pipe it into cupcakes or use it as a topping for brownies and pastries. The creamy chocolate and crunchy hazelnuts make every dessert taste extra special.
Notes
- Let the melted chocolate cool slightly before adding other ingredients so the filling does not become oily or grainy.
- Chop the hazelnuts very finely if you want the filling to spread more easily between cake layers.
- If refrigerated, let the filling sit at room temperature before using so it becomes soft and spreadable again.
- For a completely smooth filling, blend the hazelnuts in a food processor before mixing them in.
- This filling can be made one day ahead, which makes cake decorating faster and easier the next day.